
Unfortunately, I don’t have a ready to use pattern
for this, because ALL books are different, you have the spiral version or bound
books. As well as the spine being different thickness, day to a page or week to
a page diary views. And then not to mention if you start going for A4 or pocket
size books!
But I do promise this method works for all kinds of books, easy to follow, and will allow you to whip up beautiful fabric covered books in no time!!!!
But I do promise this method works for all kinds of books, easy to follow, and will allow you to whip up beautiful fabric covered books in no time!!!!
HOW TO:
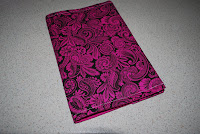
1) Firstly, work out which fabrics you would like to use for the outer and the inner.
If you are making A5 size like I am, you will need 50x30cm of both of these, as well as a medium to heavy interfacing/stabiliser. You will need slightly bigger if you are planning an A4 sized cover.
(You can get also get fancy and create a patch work or panel piece for the front to add more flare)
 2) Lay fabrics right side together, and the interfacing on top (or if you are using iron on interfacing, iron this to the back of the fabric you want as the outer), and pin it in a few places to secure the layers together.
 3) If you have a good eye for positioning your book centre of your fabric, then go for it.
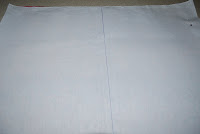
Otherwise, fold your fabric in half-length ways, and press. I have drawn a line on my interfacing so you can see the line we are looking for.
 4) Open the book and
position the spin along this line, and draw around the outside of the book.
(Use a washable marker or pencil in case it will be visible through your
fabrics, however I used biro so you can see, and I have dark fabrics)
4) Open the book and
position the spin along this line, and draw around the outside of the book.
(Use a washable marker or pencil in case it will be visible through your
fabrics, however I used biro so you can see, and I have dark fabrics)
 5) We now need to add seam allowances.
On the top and the bottom (or long sides) measure and mark 2cm from your original line.
And on the short side you will need to add half the size of your book's cover PLUS another 1cm on either side.
 6) Leaving an opening of approx. 5cm for turning, on ONE of the short sides, sew around with a 1cm seam guide.
Snip your corners as close to the stitching as you can.
 7) Turn the right way and top stitch both SHORT sides only. (I also add my tag on at this step)
 8) Fold your fabric in half-length ways again, this time slip your book in so that the spine sits in the fold.
 9) Lift up the front cover, and tuck the top flap inside.
 10) Repeat with the back cover.
11) I now feel where the bottom edge of the book is, and pin through all layers, including the flap.
 12) Taking the book back out, I sew all the way across where I have pined.
If all previous measuring, marking and sewing as been straight, this SHOULD be 1cm seam guide again.

And you're DONE!!!
It's that SIMPLE!

I also tied, and secured in place with a few stitch in a couple of places, a ribbon bow around to jazz the book up a little and also secure it closed when needed.

No comments:
Post a Comment