Showing posts with label Christmas. Show all posts

Wednesday, October 3, 2012

Seasonal Cushion Covers

I have been admiring these cushion for a while now, and with Christmas fast approaching I thought I better get to work on my Christmas "to make" list.

I made these covers removable so they could 1) fit over existing cushions, 2) not have to try and store a filled cushion during the rest of the year and 3) not have to worry what cushion filling would actually store like.


Cant wait until Christmas time and have these on display! (First I need to finish the other 2 cushions)

This is the tutorial I used, from Sparkle Power!, to make the removable cover.


Thursday, August 9, 2012

Christmas Fabric Scraps

I have HEAPS of scraps of fabric...

And while I find it easy to incorporate most of it in every day sewing, I was struggling with the Christmas scraps.

Here is the first I have made of many of the ideas I found...
It's intended for a tree decoration, but I will be using them as gift tags by ironing some hemming tape on the back to write the gift receivers name.

The tutorial and pattern I used can be found on Stumbles & Stitches


Wednesday, December 28, 2011

Waste Not

The owl softie panel I recently bought from Spotlight had 4 small owls and 2 large owls.
I only needed 3 little owls for my 3 boys.... so what to do with the spare....

turn it into a Christmas shirt of course!


Some May Say Late, Others Will say Head Start.


Bright idea on Christmas Eve morning to make a couple of reindeer softies... didn’t get them finished before Christmas.

But at least they will be ready for next year!

These were made using the Molly Monkey pattern I already had, ditched the tail and ear pieces.
Made felt antlers and drew my own eye and ear patterns.


Sunday, December 18, 2011

Hoot Hoot Little Owl Family


I couldn’t resist buying this Christmas panel during Spotlight's recent 50% off Christmas fabric.

It felt a little cheating to merely cut out the image, sew, turn and stuff.
I considered adding stitching details and ribbons and buttons etc.... but soon opted for the easy way.

The big ones make great decoration pillows during this festive season... and the little ones.... seem to be flying around the house, scattered in different rooms.


Monday, December 12, 2011

SUPER Cheap Stocking Holders


These stocking holders cost me less the $2 to make! And look GREAT holding my handmade stockings!

HOW TO

1)I went to the local hardware store, who told me to go and look in their scrap wood bin to see if something suited my project

They even helped by cutting the piece I found in to my desired size. Because it was a left over bit of wood, they didn’t charge me anything, however even if they do charge you a little, I'm sure it would only be a little, and perhaps $1 per cut... it would still be super cheap :)

2)I bought a packet of screw in hooks (from memory these were $1.50 for a packet of 6)

3)I wrapped each block in wrapping paper I already had here from previous years.

4) Placed a little piece of sticky tape where I will be putting the hook, so the paper would rip.

And screwed in the hook!


5) Add bow, ribbon or other gift decorations to really set it off.

And you’re DONE!
It's that SIMPLE!

Best of all, I can easily change the paper each year to bring in different colours or if I change my colour theme all together!


Mini Christmas Trees


How super cute are these?
AND a great use of your Christmas scraps.


HOW TO

1)Using a compass draw the largest circle on a piece of paper (for the large tree I just did the largest an A4 page would allow)

2) Then make your compass 1cm smaller and continue to down size your circle in this manner to the smallest circle you like to make- remember it halves again in size when you sew it (be sure to use the same centre point inside the previous)

3) Starting with the largest template, cut this out and out of your fabric

4) Trim your template to the next circle and cut out of a contrast fabric

5) Continue this until all the circles are cut out of fabric

6) Then it is time to make the yo-yos

7) Join together, almost like you are threading beads by sliding the needle and thread through the centre of each yo-yo, one at a time. And finish off the top with a normal button or star button.

And you’re DONE!


It's that SIMPLE!

I used a wooden cotton spool (which had been cut in half through the middle) and hot glued to the bottom as the tree trunk!


Sunday, December 11, 2011

Gifts for Under $10!

Handmade gifts are becoming bigger and bigger, and I love making handmade for personalisation (and more often than not it's more cost effective on my pocket)

So I thought I would share with you, a gift I have been making for a few years now and always appreciated (and one year when I had a new born, I had a few disappointed people when they didn’t receive this)

Best of all, it costs under $10 per gift!

you will need:
2 different plain colour sheets of card stock ($1.10 each= $2.20) - the more calendars you use this may be 2 per 2 calendars, because you use a large piece of piece A and small of piece B on one calendar, and the other will be the opposite
1 sheet of print scrapbooking paper (up to $2)
buttons, ribbons and other embellishments (I benefit from having a heap here, but you can often get coordinating ribbons from scrapbooking shops for 50c a metre)
standard photo (15c from big w)
memo board calendar from reject shop ($2) - this can be found in the craft/stationary/diary section or near the front counter. it has a white board/memory board at the top and a whiteboard pen, but it provides a nice sturdy top to cover with our new scrapbooked layout
minimum total of $7.35 (working on 2 different ribbons)


And...  TAAAA-DAAAAAH

I make these for all of the grandparents, great grandparents and 1 of my aunty's.
I also write in our birthdates, so they are never forgotten.

Friday, December 9, 2011

Results From Our Activity Advent Calendar


I thought I should show some photos from the creations the boys (and I) have made from the instructions in our activity advent calendar.

They are looking great on their tree and around the house as additional decorations.


Monday, December 5, 2011

Christmas Treat Tubes

I thought I would avoid the standard candy cane this year for the kids friends (though now this idea seems very popular lol)

But here are our Christmas treat tubes to go with the kids Christmas cards.

I bought the tubes from Pack it in.
And the gift tags were from The Reject Shop, $2 for 16.

Saturday, December 3, 2011

"But The Christmas Tree Isn't a Girl"

Is what my son said when I showed him the new tree skirt (after I first tried to tell him I had made a skirt for him to wear)

I have wanted a handmade tree skirt since last year, but wasn't confident with my sewing then, so had planned to put it on my sewing to do list for this year.
Kind of slipped my mind until I pulled out my tacky store bought tree skirt, and discovered ALOT of storage staining.

After quickly drawing a rough template of an 8th of the previous tree skirt, it went straight in the bin.

And here is my beautiful new tree skirt (matches the stockings too :))

Friday, December 2, 2011

Activity Advent Calendar


As well as our chocolate advent calendar, I also thought I’d use our fabric hanging advent calendar for a selection of Christmas activities, to help us get in to the spirit of Christmas.

Some are for the whole family to do, and some are just a little quiet activity for the kids.

As well as some will be used for gifts, decorations and other things that need to be done at Christmas time :)

1. Decorate Christmas tree
2. Write wish list to Santa
3. Colouring activity.
4. Christmas puzzles


6. Visit Santa with wish list, and get photo taken


8. Make paper chain decoration


10. Write Christmas cards for friends


13. Paper shape tree decorations

14. Hand and foot print creations

15. Make pipe cleaner candy cane decorations


18. Watch a Christmas movie with popcorn


20. Look at Christmas lights

21. Make paper lantern

22. Make Christmas cards for family's gifts on Christmas day


24. Bake cookies to leave for Santa (and left overs for Christmas day)


Sunday, November 13, 2011

Christmas Attire


I changed my mind so many times with the type of shirt I was going to make the littlest Mr for Christmas events this year.

But it suddenly all came together in my mind yesterday and created today.
(Sorry about all of the pictures, he was such a poser and I HAD to show off all these great photos of him looking very proud of his new outfit!)

Only two more shirts to make for the other boys (they have chosen and told me what they would like on theirs.. so stay watching)

Thursday, November 10, 2011

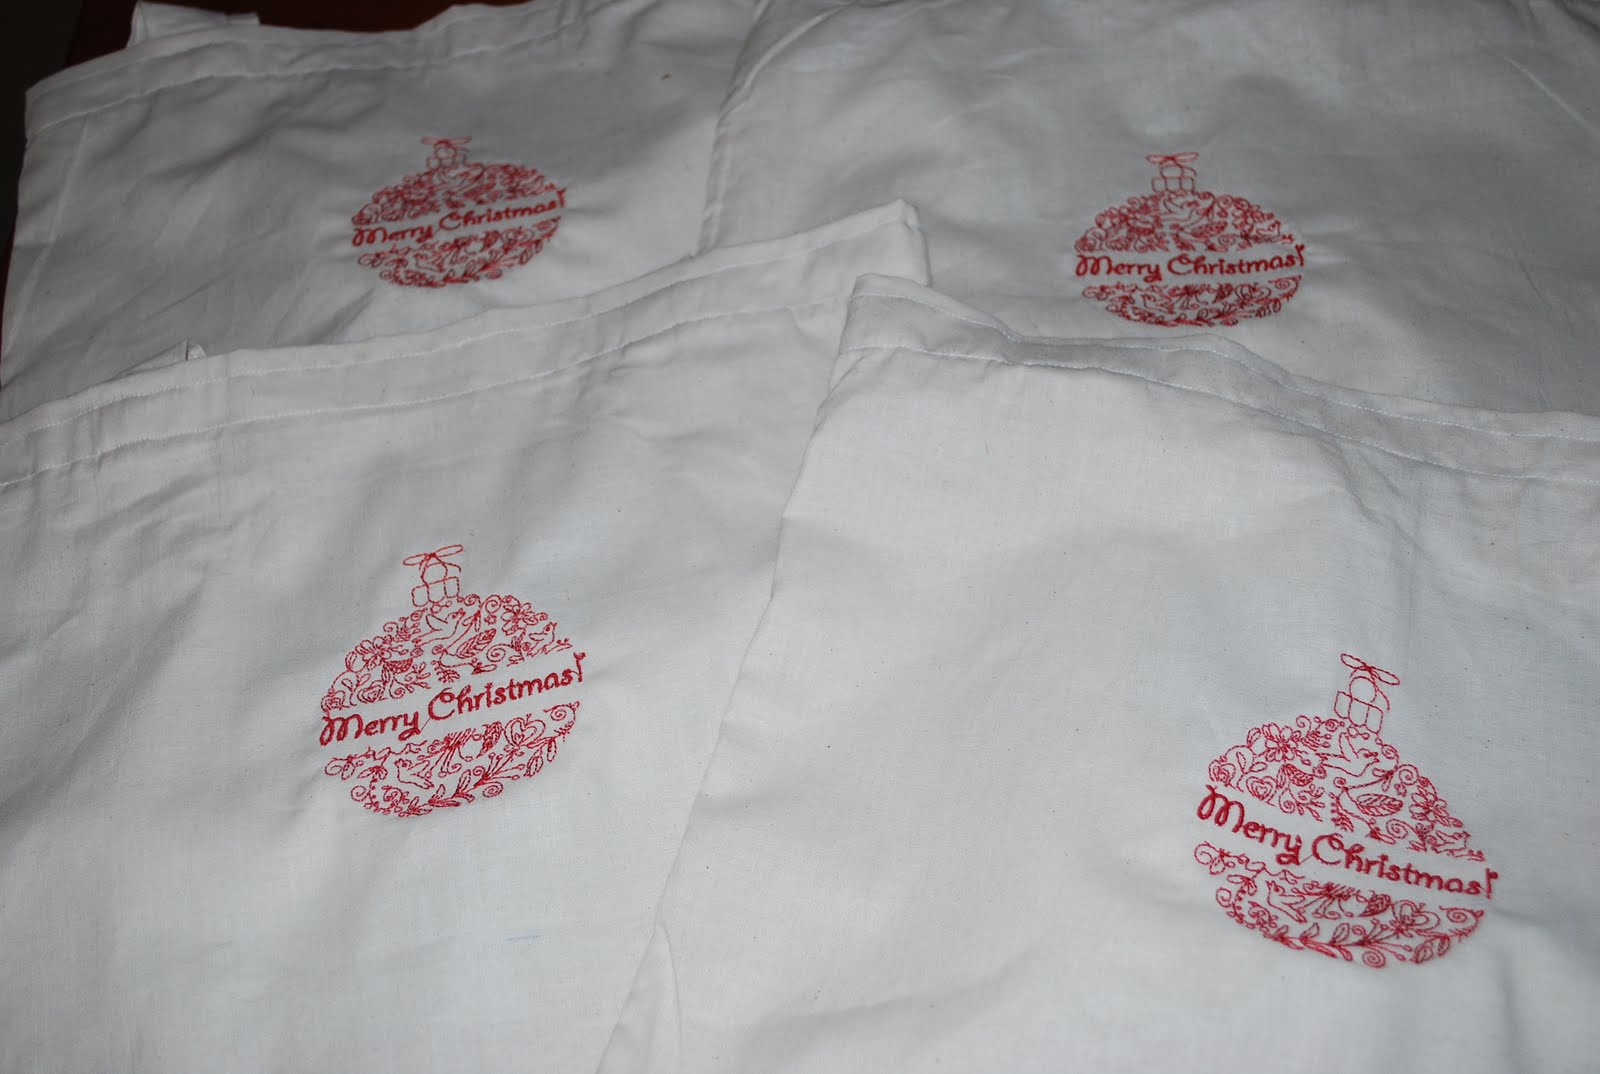
Handmade Gift Bags

Not only does it avoid wrapping paper waste, but they are pretty cute... and reusable!
I just made a simple calico bag (next time I might use ribbon or twill strips for the straps to save time and allow me to make more, or even buy some premade calico bags) and embroider the simple Christmas greeting to the front.

I hope they will be repurposed in future gift giving or as a carry bag during the Christmas time.


Tuesday, November 8, 2011

It's Beginning to Look Like Christmas.


Years and years ago, back when we had only one child, I found these HUGE Christmas stockings, like novelty size (but actually practical to fill with toys).

I loved them so much I bought 2; we had talked of having a second, so I knew this wasn’t too ridiculous.

Little did I know we would end up with 3 children and the store since close, so I couldn’t find the same size stocking again.

The first year we had our youngest, I got away with buying a MINI stocking (novelty size to the other extreme) because he was the baby and it suited.

But last year, it just wasn’t working, and still no luck finding a large one for him, AND to top it off the other boys were starting to fall apart inside where it had this weird foam lining.

So I promised myself I would make new stockings for ALL of us this year.

I had intentions to make jumbo ones for the kids, and regular size for mummy and daddy, but changed my mind.

By the way, I used this pattern, just added the fold over cuff and didn’t worry about lining
The red tree fabric is from Spotlight, the green with white spots is from my own stash.