Showing posts with label Gift Ideas. Show all posts

Thursday, January 23, 2014

More PJ Eaters- With Tutorial Tips

After my first PJ eater, I was hooked. Not only was it a big hit with the birthday boy, but it was also really simple!
Here are a couple more I have made for Birthday presents.

If you remember, I altered the body of the pattern so that I could insert a cushion insert, this allows for easier washing, and also that the insert can be replaced if ever needed.

I did keep the hand and feet pattern the same, but I wanted to offer you some tips on how I sew it together, as I have heard of a couple of people having trouble getting the curved sole to fit in the leg part.
This not only works for these feet but any curve and straight edge combination.


HOW TO:
1) Line up the straight edge on the curved piece, where you would like the seam, then move it over 1cm more.


2) Start sewing from where you originally wanted the seam, as we will need that extra 1cm to actually create the seam.
Make sure the curved piece is the piece you have positioned on top while you are at the machine.


3) slowly sew around the edge, moving just the curved piece as you go, making sure the edges still line up.


4) Sew right up to where you started and finish off.


5) When you now look at the straight piece, it may not line up completely on what will be our seam edge- but just imagine sewing that first and trying to make the curve piece not fit, as it often makes the straight piece too big and requires a lot of pinning, adjusting and frustration.


6) Matching up the side edges so they are straight- but not necessarily meeting, sew from your last finished point straight down the edge.


And you're DONE!
It's that SIMPLE!

Saturday, August 17, 2013

Monster PJ Eater

I LOVE the PJ eater's that are getting around lately, so I decided to make one for a birthday gift.

I used the pattern from Sew Fearless, but made it slightly larger so I could just insert a cushion insert rather the stuffing and risk lumpiness.

And felt it needed a cute little poem to go with it (just in case the new owner didn't quite understand what it was for)

I am a friendly monster,
who loves to sit on your bed,
and every morning as you wake,
I get grumpy if I'm not fed.

I love to eat fabric,
It's my favourite food,
Just one pair of PJ's in my tummy,
It will keep me in a very good mood.


Nothing like making it personalised either.


Friday, November 23, 2012

Easy Fold-up Shopping Bag Tutorial

This is possibly the easiest way to make a fold up shopping bag, that you wont be able to live without 1 (or 3 like myself) in your handbag and car.

You will need:
Either a simple rectangle/square shaped bag you have made, or a premade bag to make it even easier.
1 hair elastic
1 button

HOW TO

1) Find the middle of the back, and sew a hair elastic in place with a few straight stitches back and forth.

2) Turn the bag to face front up
3) Fold the bag, first with handles on top of the bag

4) Fold one 3rd of the bags side in on itself
5) and repeat with the other side

6) Then start rolling from the bottom and find where the elastic will stretch to.
7) Mark with your sewing needle, but dont start sewing the button on until you unfold it, to ensure you one sew through one layer of the bag.

8) Fold back up and secure with elastic around the button.

And you’re DONE!
It's that SIMPLE!


Thursday, August 9, 2012

Christmas Fabric Scraps

I have HEAPS of scraps of fabric...

And while I find it easy to incorporate most of it in every day sewing, I was struggling with the Christmas scraps.

Here is the first I have made of many of the ideas I found...
It's intended for a tree decoration, but I will be using them as gift tags by ironing some hemming tape on the back to write the gift receivers name.

The tutorial and pattern I used can be found on Stumbles & Stitches


Sunday, July 29, 2012

Teacher Appreciation Day

I really appreciate my children’s teacher; they go above and beyond what is required of them.
The whole school has me very impressed really.

So while I got a little ahead of myself, (I thought Teacher appreciation day was coming in July... but it's not until October) I am well organised now!

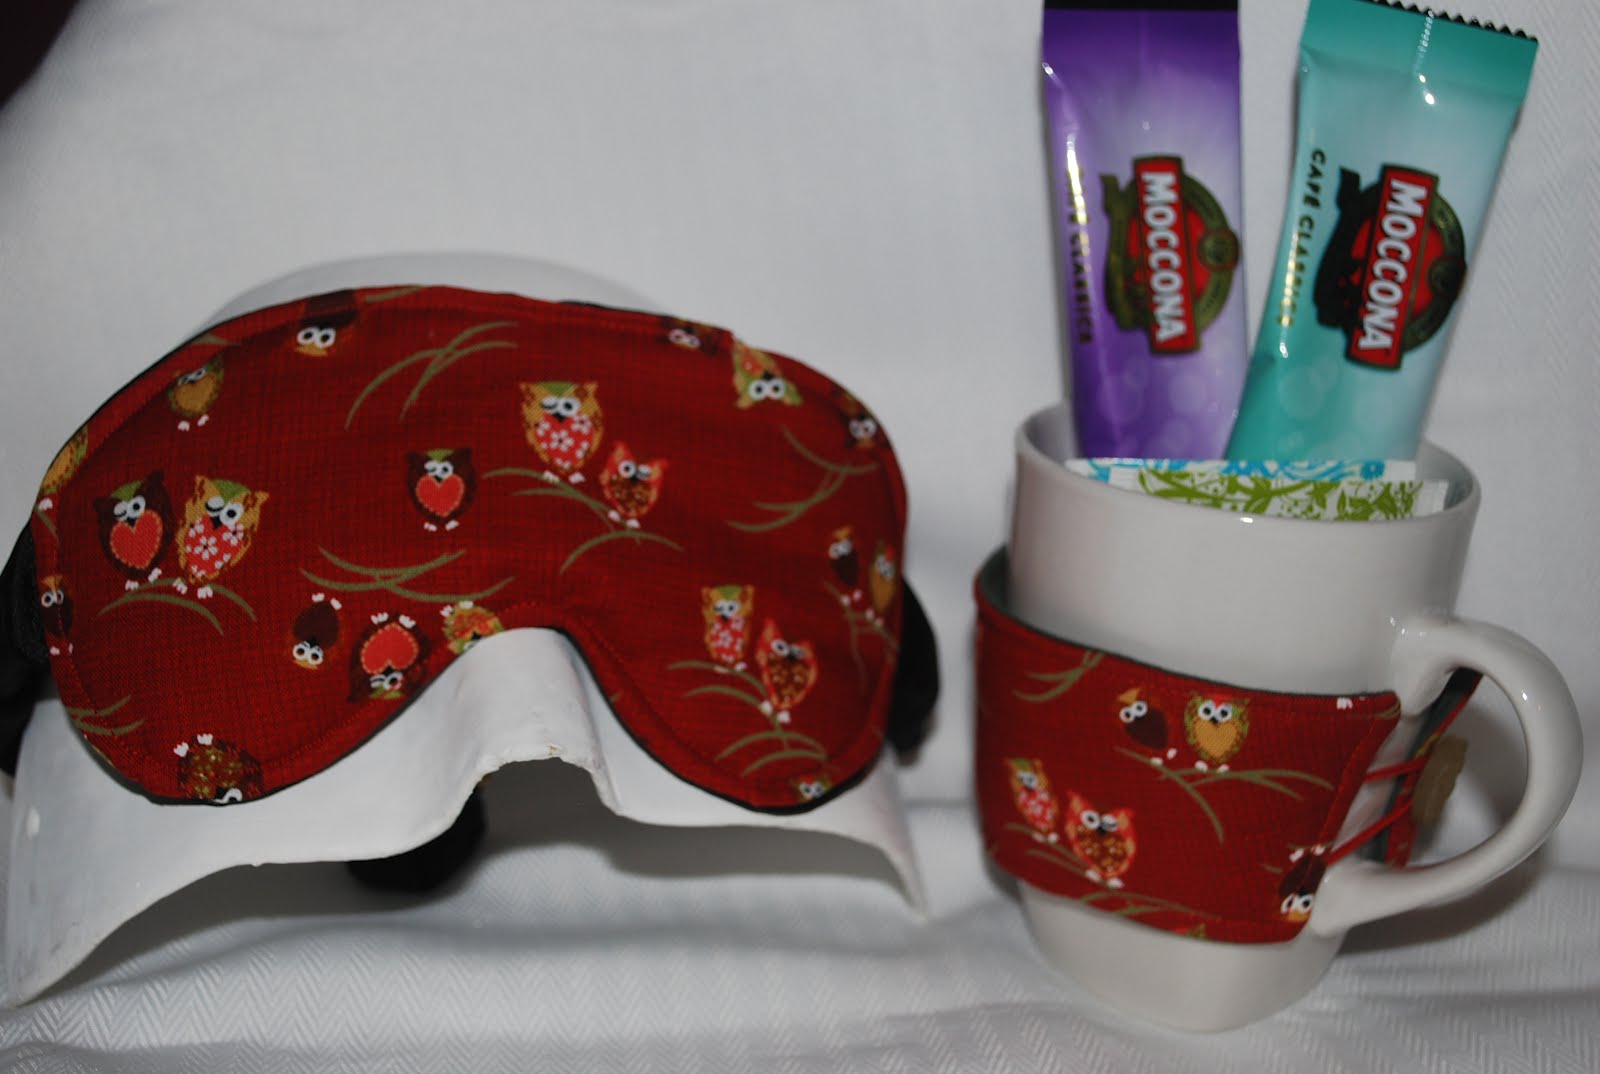
Each of the teachers the children chose (8 all up) will receive a sleep mask, coffee mug with cup cosy and an assortment of tea bags and coffee sachets.

It will also be teamed up with this poem:


A well-earned cuppa for you,
To say 'thanks for all that you do.
Making a difference teaching my child this year,
experiencing many giggles and even a tear.

I think it's time for a well-deserved rest,
So out of these beverages, please choose the best,
Put up your feet, have some fun,
Relax- It’s another day done!


Happy Teacher’s Appreciation Day!!!


and all wrapped up. They were a big hit!


Thursday, March 15, 2012

Art Journal

A BIG thank you to LBG Studio for my new favourite tutorial that has become my main gift drawer stocking, the Art Journal.

I have made 4 of these so far, with many more planned as the stock gets low.

I have filled them with a mixture of sketch books, notepads, colouring in books, and stickers.
Plus the essential colouring in pencils and lead pencils.


Friday, January 27, 2012

Mini Organiser

I am a BIG fan of note books, stationary and all things drawing and writing... always have! (I think it drove my mum crazy when I was younger to be honest)

So I couldn't help but make one of these "organiser wallets" for myself.

And while I was at it... whats another 7 more to add to the gift drawer!

(Usually this drawer consists of items I have found on special for the kids friends birthday parties that often spring up suddenly, but this year I hope to have more handmade items in this drawer ready for Birthdays or Christmas. This particular item may be more suited to adults, but I’m sure there will be some little girls out there that like notes and drawing also)

some other versions i have done, is remove the curved pocket, and make the large on in to a mini pencil holder


Sunday, December 11, 2011

Gifts for Under $10!

Handmade gifts are becoming bigger and bigger, and I love making handmade for personalisation (and more often than not it's more cost effective on my pocket)

So I thought I would share with you, a gift I have been making for a few years now and always appreciated (and one year when I had a new born, I had a few disappointed people when they didn’t receive this)

Best of all, it costs under $10 per gift!

you will need:
2 different plain colour sheets of card stock ($1.10 each= $2.20) - the more calendars you use this may be 2 per 2 calendars, because you use a large piece of piece A and small of piece B on one calendar, and the other will be the opposite
1 sheet of print scrapbooking paper (up to $2)
buttons, ribbons and other embellishments (I benefit from having a heap here, but you can often get coordinating ribbons from scrapbooking shops for 50c a metre)
standard photo (15c from big w)
memo board calendar from reject shop ($2) - this can be found in the craft/stationary/diary section or near the front counter. it has a white board/memory board at the top and a whiteboard pen, but it provides a nice sturdy top to cover with our new scrapbooked layout
minimum total of $7.35 (working on 2 different ribbons)


And...  TAAAA-DAAAAAH

I make these for all of the grandparents, great grandparents and 1 of my aunty's.
I also write in our birthdates, so they are never forgotten.

Monday, December 5, 2011

Christmas Treat Tubes

I thought I would avoid the standard candy cane this year for the kids friends (though now this idea seems very popular lol)

But here are our Christmas treat tubes to go with the kids Christmas cards.

I bought the tubes from Pack it in.
And the gift tags were from The Reject Shop, $2 for 16.

Thursday, November 10, 2011

Handmade Gift Bags

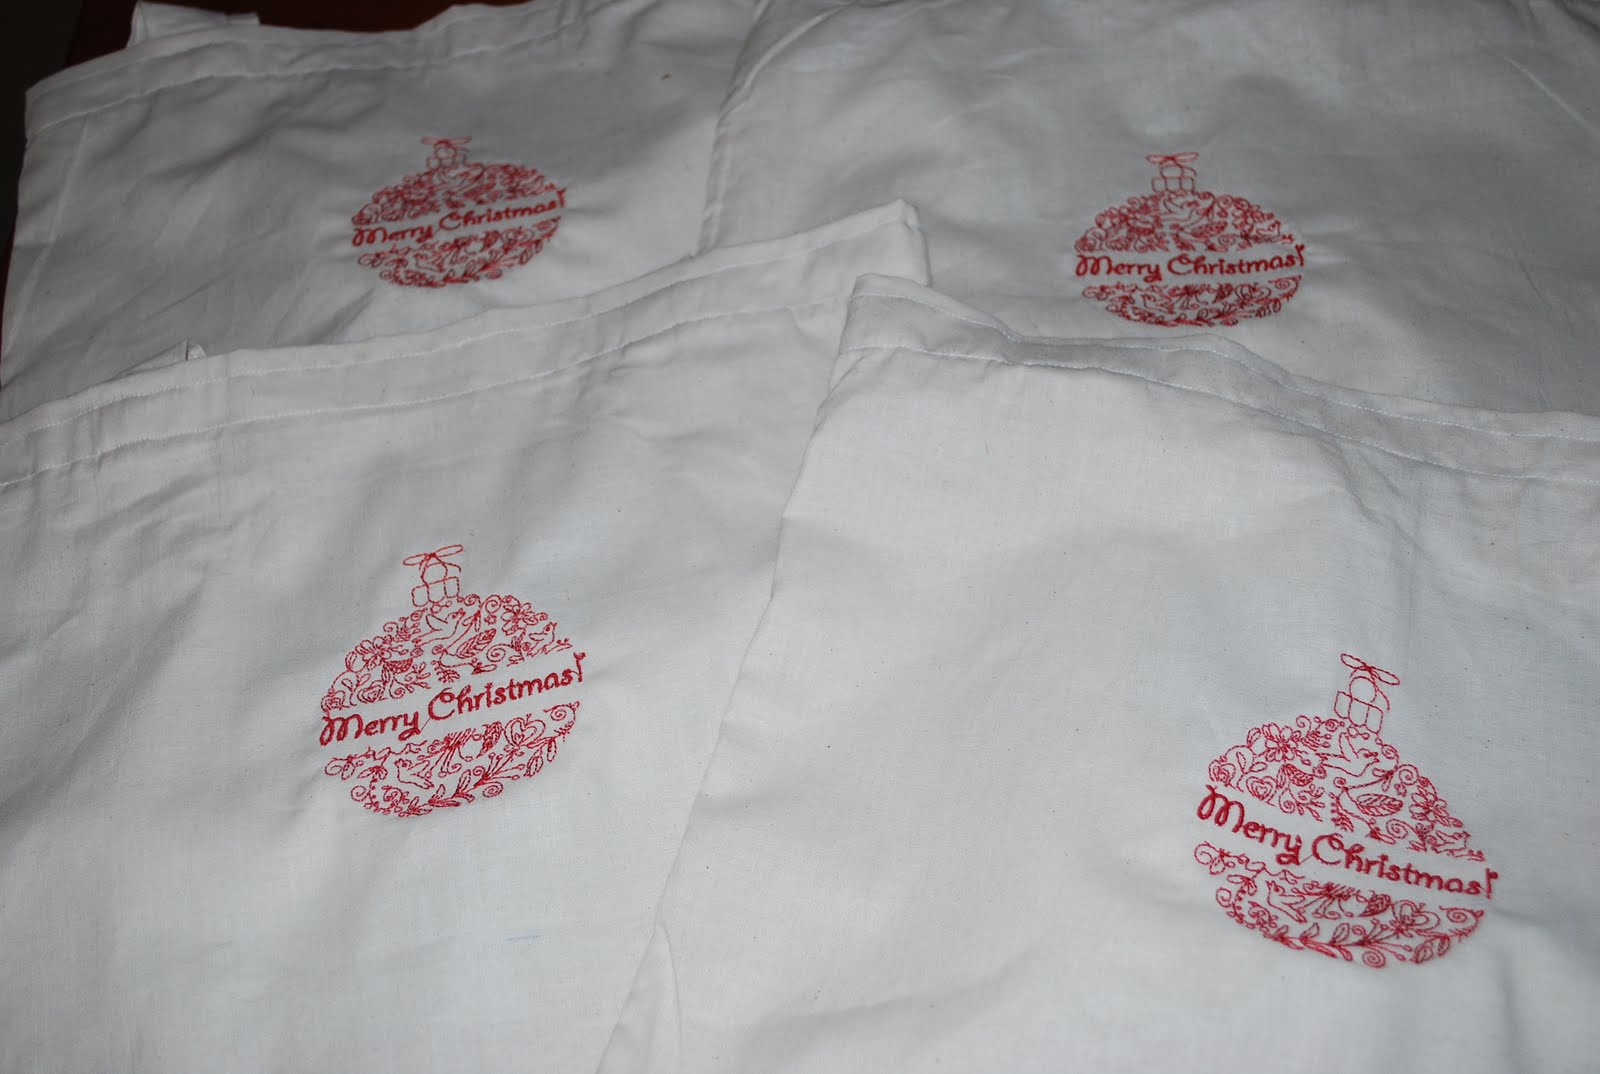
Not only does it avoid wrapping paper waste, but they are pretty cute... and reusable!
I just made a simple calico bag (next time I might use ribbon or twill strips for the straps to save time and allow me to make more, or even buy some premade calico bags) and embroider the simple Christmas greeting to the front.

I hope they will be repurposed in future gift giving or as a carry bag during the Christmas time.


Patchwork Diary Covers


Using the exact same method as I explain in my Fabric Covered Book Tutorial (except instead of drawing the measurements on to my interfacing, I did it on some paper beforehand because all 5 books were going to be the same size) I made some patch work diary covers for Christmas gifts for the kid's teachers.


Work out the fabrics you’d like to use for the front.

Using a couple of different sizes of paper (I just used a notepad I have, similar to post it notes, 1 was the full size, the other was folded in half one way, and the other folded the other) I then cut out a few of each fabric in the different sizes.

With my paper pattern as a size template I arrange the fabric pieces to fit in the best without too many of the same fabric touching completely. (Remember your fabric pieces are going to NEED to hang over the edge of this pattern, because when you sew each piece together you are going to lose a bit of its size)

Once you have created you "Main fabric" you continue all the steps exactly the same as the other tutorial!

Friday, October 21, 2011

Fabric Covered Book TUTORIAL

Unfortunately, I don’t have a ready to use pattern for this, because ALL books are different, you have the spiral version or bound books. As well as the spine being different thickness, day to a page or week to a page diary views. And then not to mention if you start going for A4 or pocket size books!

But I do promise this method works for all kinds of books, easy to follow, and will allow you to whip up beautiful fabric covered books in no time!!!!


HOW TO:

1) Firstly, work out which fabrics you would like to use for the outer and the inner.
If you are making A5 size like I am, you will need 50x30cm of both of these, as well as a medium to heavy interfacing/stabiliser. You will need slightly bigger if you are planning an A4 sized cover.
(You can get also get fancy and create a patch work or panel piece for the front to add more flare)
2) Lay fabrics right side together, and the interfacing on top (or if you are using iron on interfacing, iron this to the back of the fabric you want as the outer), and pin it in a few places to secure the layers together.
3) If you have a good eye for positioning your book centre of your fabric, then go for it.
Otherwise, fold your fabric in half-length ways, and press. I have drawn a line on my interfacing so you can see the line we are looking for.
4) Open the book and position the spin along this line, and draw around the outside of the book. (Use a washable marker or pencil in case it will be visible through your fabrics, however I used biro so you can see, and I have dark fabrics)
5) We now need to add seam allowances.
On the top and the bottom (or long sides) measure and mark 2cm from your original line.
And on the short side you will need to add half the size of your book's cover PLUS another 1cm on either side.
6) Leaving an opening of approx. 5cm for turning, on ONE of the short sides, sew around with a 1cm seam guide.
Snip your corners as close to the stitching as you can.
7) Turn the right way and top stitch both SHORT sides only. (I also add my tag on at this step)
8) Fold your fabric in half-length ways again, this time slip your book in so that the spine sits in the fold.
9) Lift up the front cover, and tuck the top flap inside.
10) Repeat with the back cover.

11) I now feel where the bottom edge of the book is, and pin through all layers, including the flap.
12) Taking the book back out, I sew all the way across where I have pined.
If all previous measuring, marking and sewing as been straight, this SHOULD be 1cm seam guide again.
And you're DONE!!!
It's that SIMPLE!

I also tied, and secured in place with a few stitch in a couple of places, a ribbon bow around to jazz the book up a little and also secure it closed when needed.