Showing posts with label Toys. Show all posts

Tuesday, February 18, 2014

Long Awaited Tool Belt Tutorial!

Finally I have had a chance to blog the tool belt tutorial!
it was mainly a matter of needing to make a tool belt for someone as well as document the progress in one go that had been stopping my motivation before.
Now I am prepared for our friends 2 year olds birthday.


You will need:
belt main: 29"x 6.5" of fabric and interfacing
Pocket: 9" x 4.5" of fabric x2
loops: 1.5" x 17"
Elastic: 9"
Snaps or Velcro

HOW TO
1) fold the belt main in half length ways with right sides together and interfacing on the wrong side of both sides, sew all the way around leaving a turning gap on the long side.

2) snip corners, turn and top stitch all the way around.


3) place to 2 pocket pieces right side together, sewing all the way around leaving a turning gap on one of the short sides.


4) snip corners, turn and top stitch ONLY the side with the turning gap.


5) fold the top stitched side up 3" to create a pocket shape.
top stitch up the side, across the top and down the side. (very similar to our mini purse tutorial)


6)Fold loops fabric in half and sew only up the long side.

7) turn and thread the elastic through. you might need to use a safety pin to help slide it through, and also to pin the ends securely with the fabric so you don't loose the elastic tail.


8) placing the pocket 11" from the right side of the belt, pin it in place just above the opening.
and also pin one side of the elastic loop under the left side of the pocket.

9) securely sew in place where you have just pinned.


10) This part is easier if you have the desire tools with you, I bought this pack from big w for just $10.
Work out which order you want the tools, and place them under the elastic loops to work out fit.
make sure they are a tight fit, but still plenty of elastic movement.


11) stitch all tool loops in place.


12) now you need to tuck the end of the fabric in around the elastic, without loosing the elastic end. and top stitch this end.

13) in the same way as the sewn down loops, make sure you have the right fit for your last tool, but this tool fits better with a snap or Velcro because of its handle.


14) place snaps 2" apart of the right side of the tool belt for size adjustment, and one on the left side. use a strip of Velcro if this is your preferred method.
Don't forget a closure for the centre of the pocket.


And you’re DONE!
It's that SIMPLE!


How great would this look with on of our worker dress up vests, available from our store.


Monday, January 27, 2014

Simple Personalised Stationary

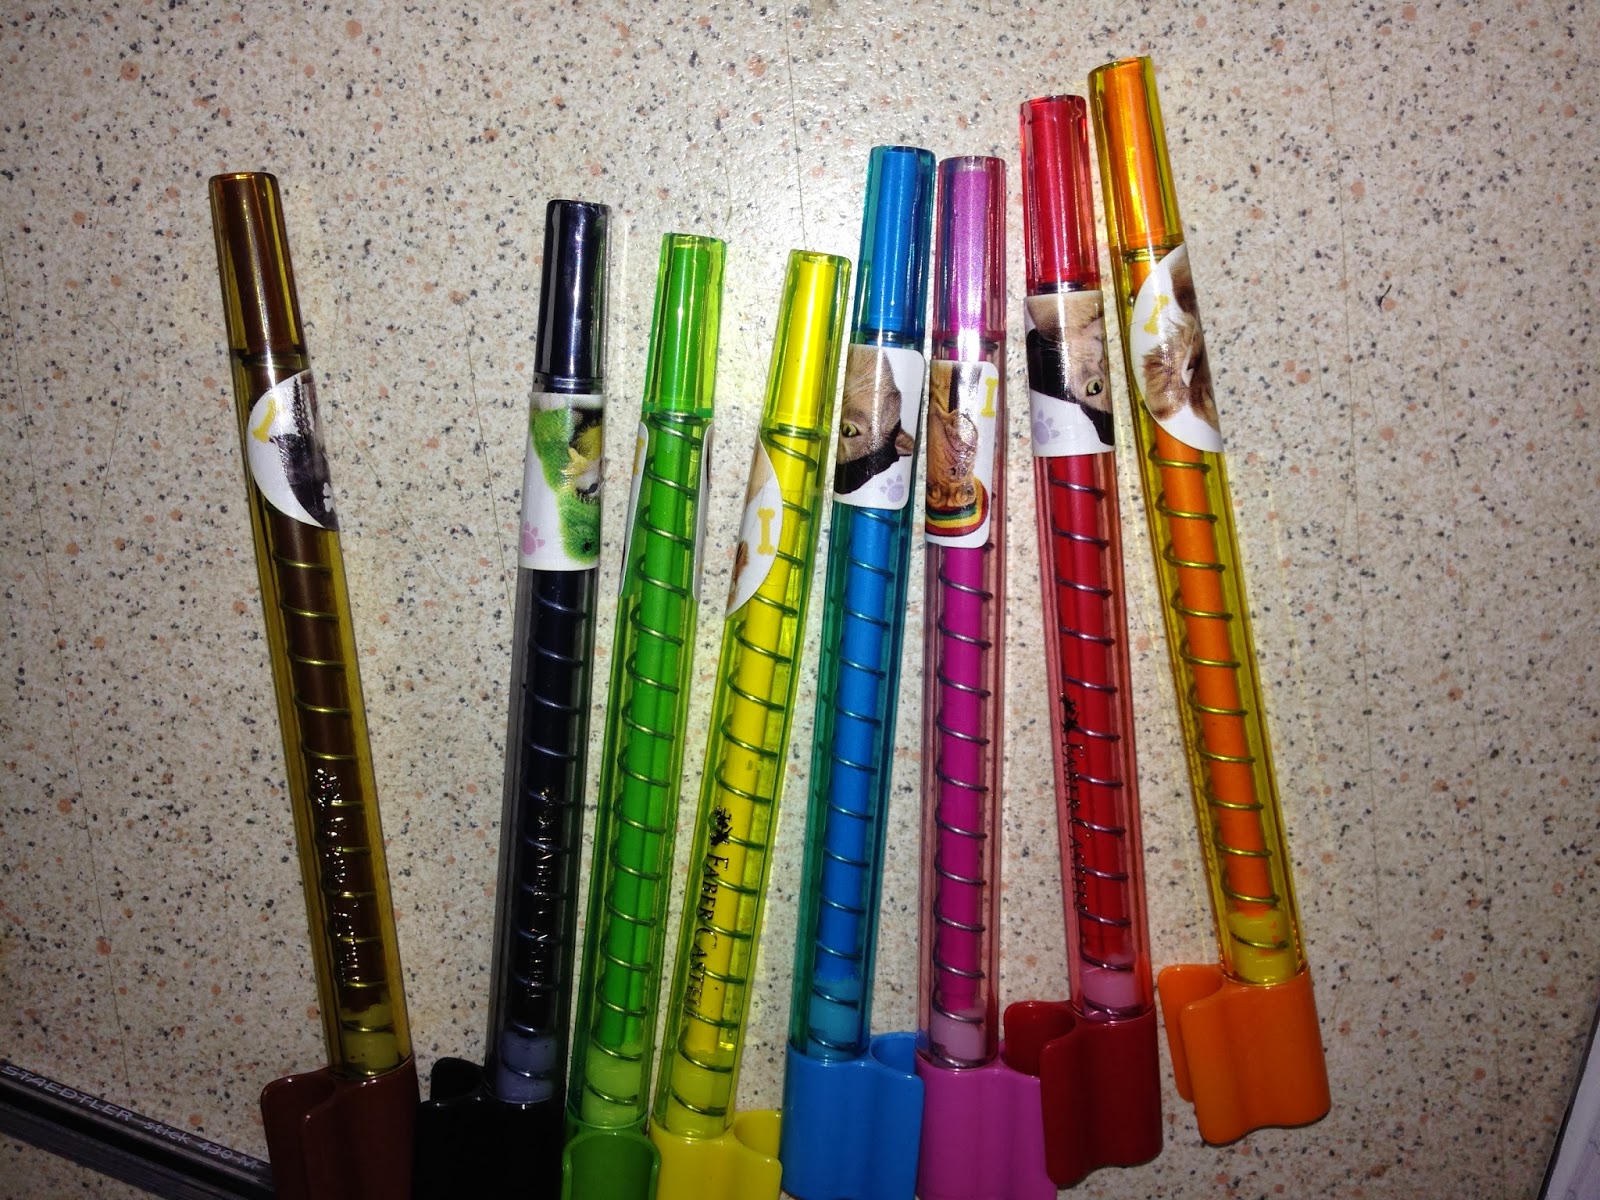
If you are anything like our household, with our 3 boys, you will have 3 of everything.


This can get a little confusing with textas and crayons when they are all drawing at once and they are scattered all over the floor.
And when one child is a bit younger and a culprit of "dotting his textas" of course the other two children don't want their colours to end up wrecked.


So I simply use some of the million stickers we have in the house, sticking with one theme for each child
And a piece of sticky tape wrapped around each to provide a bit more protection and "stick".
Makes cleaning up heaps easier and each child knows exactly which colours are theirs.


Thursday, January 23, 2014

More PJ Eaters- With Tutorial Tips

After my first PJ eater, I was hooked. Not only was it a big hit with the birthday boy, but it was also really simple!
Here are a couple more I have made for Birthday presents.

If you remember, I altered the body of the pattern so that I could insert a cushion insert, this allows for easier washing, and also that the insert can be replaced if ever needed.

I did keep the hand and feet pattern the same, but I wanted to offer you some tips on how I sew it together, as I have heard of a couple of people having trouble getting the curved sole to fit in the leg part.
This not only works for these feet but any curve and straight edge combination.


HOW TO:
1) Line up the straight edge on the curved piece, where you would like the seam, then move it over 1cm more.


2) Start sewing from where you originally wanted the seam, as we will need that extra 1cm to actually create the seam.
Make sure the curved piece is the piece you have positioned on top while you are at the machine.


3) slowly sew around the edge, moving just the curved piece as you go, making sure the edges still line up.


4) Sew right up to where you started and finish off.


5) When you now look at the straight piece, it may not line up completely on what will be our seam edge- but just imagine sewing that first and trying to make the curve piece not fit, as it often makes the straight piece too big and requires a lot of pinning, adjusting and frustration.


6) Matching up the side edges so they are straight- but not necessarily meeting, sew from your last finished point straight down the edge.


And you're DONE!
It's that SIMPLE!

Saturday, August 17, 2013

Monster PJ Eater

I LOVE the PJ eater's that are getting around lately, so I decided to make one for a birthday gift.

I used the pattern from Sew Fearless, but made it slightly larger so I could just insert a cushion insert rather the stuffing and risk lumpiness.

And felt it needed a cute little poem to go with it (just in case the new owner didn't quite understand what it was for)

I am a friendly monster,
who loves to sit on your bed,
and every morning as you wake,
I get grumpy if I'm not fed.

I love to eat fabric,
It's my favourite food,
Just one pair of PJ's in my tummy,
It will keep me in a very good mood.


Nothing like making it personalised either.


Tuesday, July 9, 2013

*coming soon* Tool Belt Tutorial


Wednesday, April 17, 2013

Super Cape Fit for a Hero Tutorial


Everyone, big and small wants their own personalised superhero cape!

And here is the simplest way to make one for every member of your family.


You will need
Main fabric for cape, approx. 1/4 of a metre
2x 15cm x 15cm contrast fabric
felt or cotton for superhero emblem and letter/shape

HOW TO
1) I have always made bulk amounts of these, so would always cut a metre into quarters to get 4 capes.
so I guess measurements would be approx. 50cm x half WOF (Width of Fabric)

2) I then over lock the 4 edges and do a double fold hem on 3 of the sides, but if you don't have an over locker just do the double fold hem.
 
3) Along the 4th edge, fold and sew down a casing large enough for your elastic

 
4) at this stage, find the centre of the back of the cape and pin and sew your super hero symbol.
For best results, don't for get the heat n bond on the back of the letter and emblem if you use cotton fabric.
I like to use a blanket stich around the edges, but zig zag stitch works nicely too.


5) thread elastic through the casing and secure in place on each edge with a few back and forth stitches.

 
6) Fold tab piece of fabric in half, with right sides together.
sew around the two long sides and one short side.
turn right way and tuck raw edges of short side inside itself

7) secure on the back of the cape, covering your elastic securing stitches, with a X of stitches.

8) add snaps or Velcro as closure on the tab

And you're DONE!
It's that SIMPLE!

Thursday, November 29, 2012

Car Pouch Tutorial

And who hasnt put their hand in their hand bag and pulled out a toy car instead of their ringing mobile?

With this cute little pouch, your child will be able to keep 3 of their favourite cars nice and safely together.
Ready to play with while out and about- waiting for the doctor, on the cafe table, or in the middle of the groccery aisle!


You Will Need:

Outer fabric 17x 24cm
Inner fabric 17x24cm
pocket piece 17x16cm

HOW TO:

1) Fold pocket piece in half to create a rectange 17x8cm, and top stitch along the folded edge.

2) Position on the bottom of the inner layer

3) On the bottom-back of your inner piece, find the middle and mark 1inch either side of it.
This is where you will sew a straight line to create the individual car pockets.
Be sure to go back and forth a couple of times at the top of the pocket to make sure it will hold up against cars going in and out all the time.
4)I will be using a hair elastic and button for the pouches closure, same concept as the Fold-up Shopping Bag.
Snaps can also be put on towards the end, in the two corners if you prefer.
 
5)  Placing fabrics right side together, it is time to pin together and sew around the outside, leaving a turning gap at the top (shown where my fingers are, not sure why my photo is turned at the moment)

6) Snip the corners and turn in the right way. Top stitching the turning hole and all the way around the outside.

7) Positiong the button in place.

And you're DONE!
It's that SIMPLE!


Tuesday, August 21, 2012

Baby Born Clothing Tutorial

Pillowcase Dress
Download printable pattern here


Short Pinafore Dress
Download printable pattern here


Long Pinafore Dress
Download printable pattern part 1 here
and part 2 here

HOW TO:

1) Cut front and back piece on fold.

2) Sew applique shape to front of dress using blanket stitch or zig zag.
As this item is not being washed as often as childrens clothing, it is up to you if you use heat and bond on the back of the shape.


3) Overlock or hem the bottom of the 2 yoke pieces.
4) With right sides together sew the yoke pieces to the dress pieces. From arm hole to arm hole.
Turn in the right way so the yoke will end up on the inside of the dress.


5) Fold band in half length ways and overlock or sew to dress pieces.


6) Fold band down. (hmm must fix this side ways photo)
7) With right sides together, sew or overlock down the sides of the dress

8) Turn right way.
Attach your prefered closure on the straps.
This could be button and button hole, sew on metal snaps, plastic press stud snaps or velcro.


And you're DONE!
It's that SIMPLE!